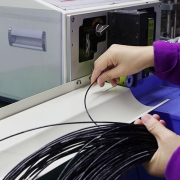
How to Assemble the Energy Storage Wiring Harness with Connectors?
Assembling an energy storage wiring harness with connectors requires precision and attention to detail to ensure proper functionality and safety. In this step-by-step guide, we’ll walk you through the assembly process, helping you achieve reliable connections for energy storage systems. To make things even clearer, we’ve included a video demonstration to visually guide you through the process.
Preparation Before Assembly
Before starting the assembly, ensure you have the following tools and materials ready:
- Wire Cutting and Stripping Tool: For precise cutting and stripping of the wires.
- Crimping Tool: To attach terminals to the wires securely.
- Heat Shrink Tubing and Heat Gun: For insulation and strain relief.
- Multimeter: To check continuity and verify connections.
- Connectors: Depending on your application, this may include plug, socket, or modular connectors.
- Energy Storage Wiring Harness: Pre-cut or custom-designed wires based on your system requirements.
- Assembly Diagram or Blueprint: Always have your wiring diagram to ensure accuracy.
Step-by-Step Assembly Instructions
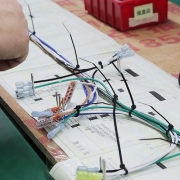
Step 1: Review the Wiring Diagram
- Start by carefully reviewing the wiring diagram specific to your energy storage system.
- Confirm the wire lengths, connector types, and terminal orientations as indicated in the design.
Step 2: Prepare the Wires
- Cut the wires to the required lengths using the wire-cutting tool.
- Strip approximately 5–10 mm of insulation from the ends of each wire. Ensure you don’t nick the conductor.
Step 3: Attach Terminals
- Choose the appropriate terminal for the wire and connector type.
- Place the stripped wire into the terminal and use the crimping tool to secure it.
- Give a gentle tug to ensure the crimp is firm and the wire is secure.
Step 4: Insert Wires into Connectors
- Align the terminals with the designated slots in the connector housing.
- Push the terminals into the housing until you hear or feel a “click,” indicating they are locked in place.
- For modular connectors, verify the sequence matches the wiring diagram.
Step 5: Apply Heat Shrink Tubing
- Slide heat shrink tubing over the exposed connection points.
- Use a heat gun to shrink the tubing, creating a tight seal for insulation and strain relief.
Step 6: Test the Connections
- Use a multimeter to test the continuity of each connection.
- Ensure there are no open circuits or short circuits before proceeding.
Step 7: Bundle the Harness
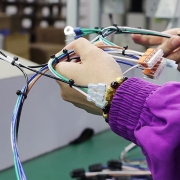
- Use cable ties or wrapping tape to organize and bundle the wires.
- Make sure the harness is neat and free from excessive tension or twists.
Step 8: Final Inspection
- Inspect the entire wiring harness assembly for any loose connections, exposed wires, or misaligned terminals.
- Compare the completed assembly to the wiring diagram for accuracy.
Watch the Assembly Video
To further assist you, we’ve created a detailed video demonstrating the entire process step-by-step. Watch the video below to see how to assemble the energy storage wiring harness with connectors and ensure optimal performance:
Key Tips for Success
- Double-check all connections during each step to avoid errors.
- Always use certified tools and materials to ensure high-quality results.
- Follow safety precautions, especially when working with electrical systems.
Why Choose FPIC for Your Energy Storage Wiring Harness?
At FPIC, we specialize in the design and manufacturing of high-quality wiring harnesses for energy storage systems. With certifications like ISO9001, ISO14001, and IATF16949, we ensure every product meets global standards. Our wiring harnesses are designed for reliability, durability, and optimal performance in critical applications.
If you need custom wiring solutions or additional support, contact us today! Let FPIC be your trusted partner in energy storage wiring harness manufacturing.


